Let us discuss all options that are found under the menu option Administration -> CRM preferences. There are two important things to keep in mind:
- CRM preferences are only accessible for users with 'Administration menu access' rights because they contain settings that can have major consequences for the use of the software.
- All changes made in CRM preferences apply to all users within the database.
The CRM preferences screen consists of several tabs. In this chapter, we will discuss all items within these tabs. Each tab has its paragraph:
16.1 General

We repeat once again: all changes made inCRM preferences apply to all users within the database.
Display language
Choose your preferred language. You can choose from the following languages: English, Dutch, Italian, French, Danish, Brazilian Portuguese, and Spanish.
Date format
Choose between dd/mm/yyyy or mm/dd/yyyy. This setting will change all date formats that are used in SpinOffice.
Time format
24-hour clock or AM/PM clock.
Country state field
The option is to show the US states, Canadian provinces, Australian states, and Brazilian states on the contact card.
Hide the date for today's items.
Only the time is shown for items (emails, tasks, etc.) once this option is ticked. This results in a visually better distinction between today's items and items from the past.
Enable time registration
This option is shown but is only working once you have a Pro license. It allows you to add time to a folder, with a timesheet log as a result.
16.2 CRM part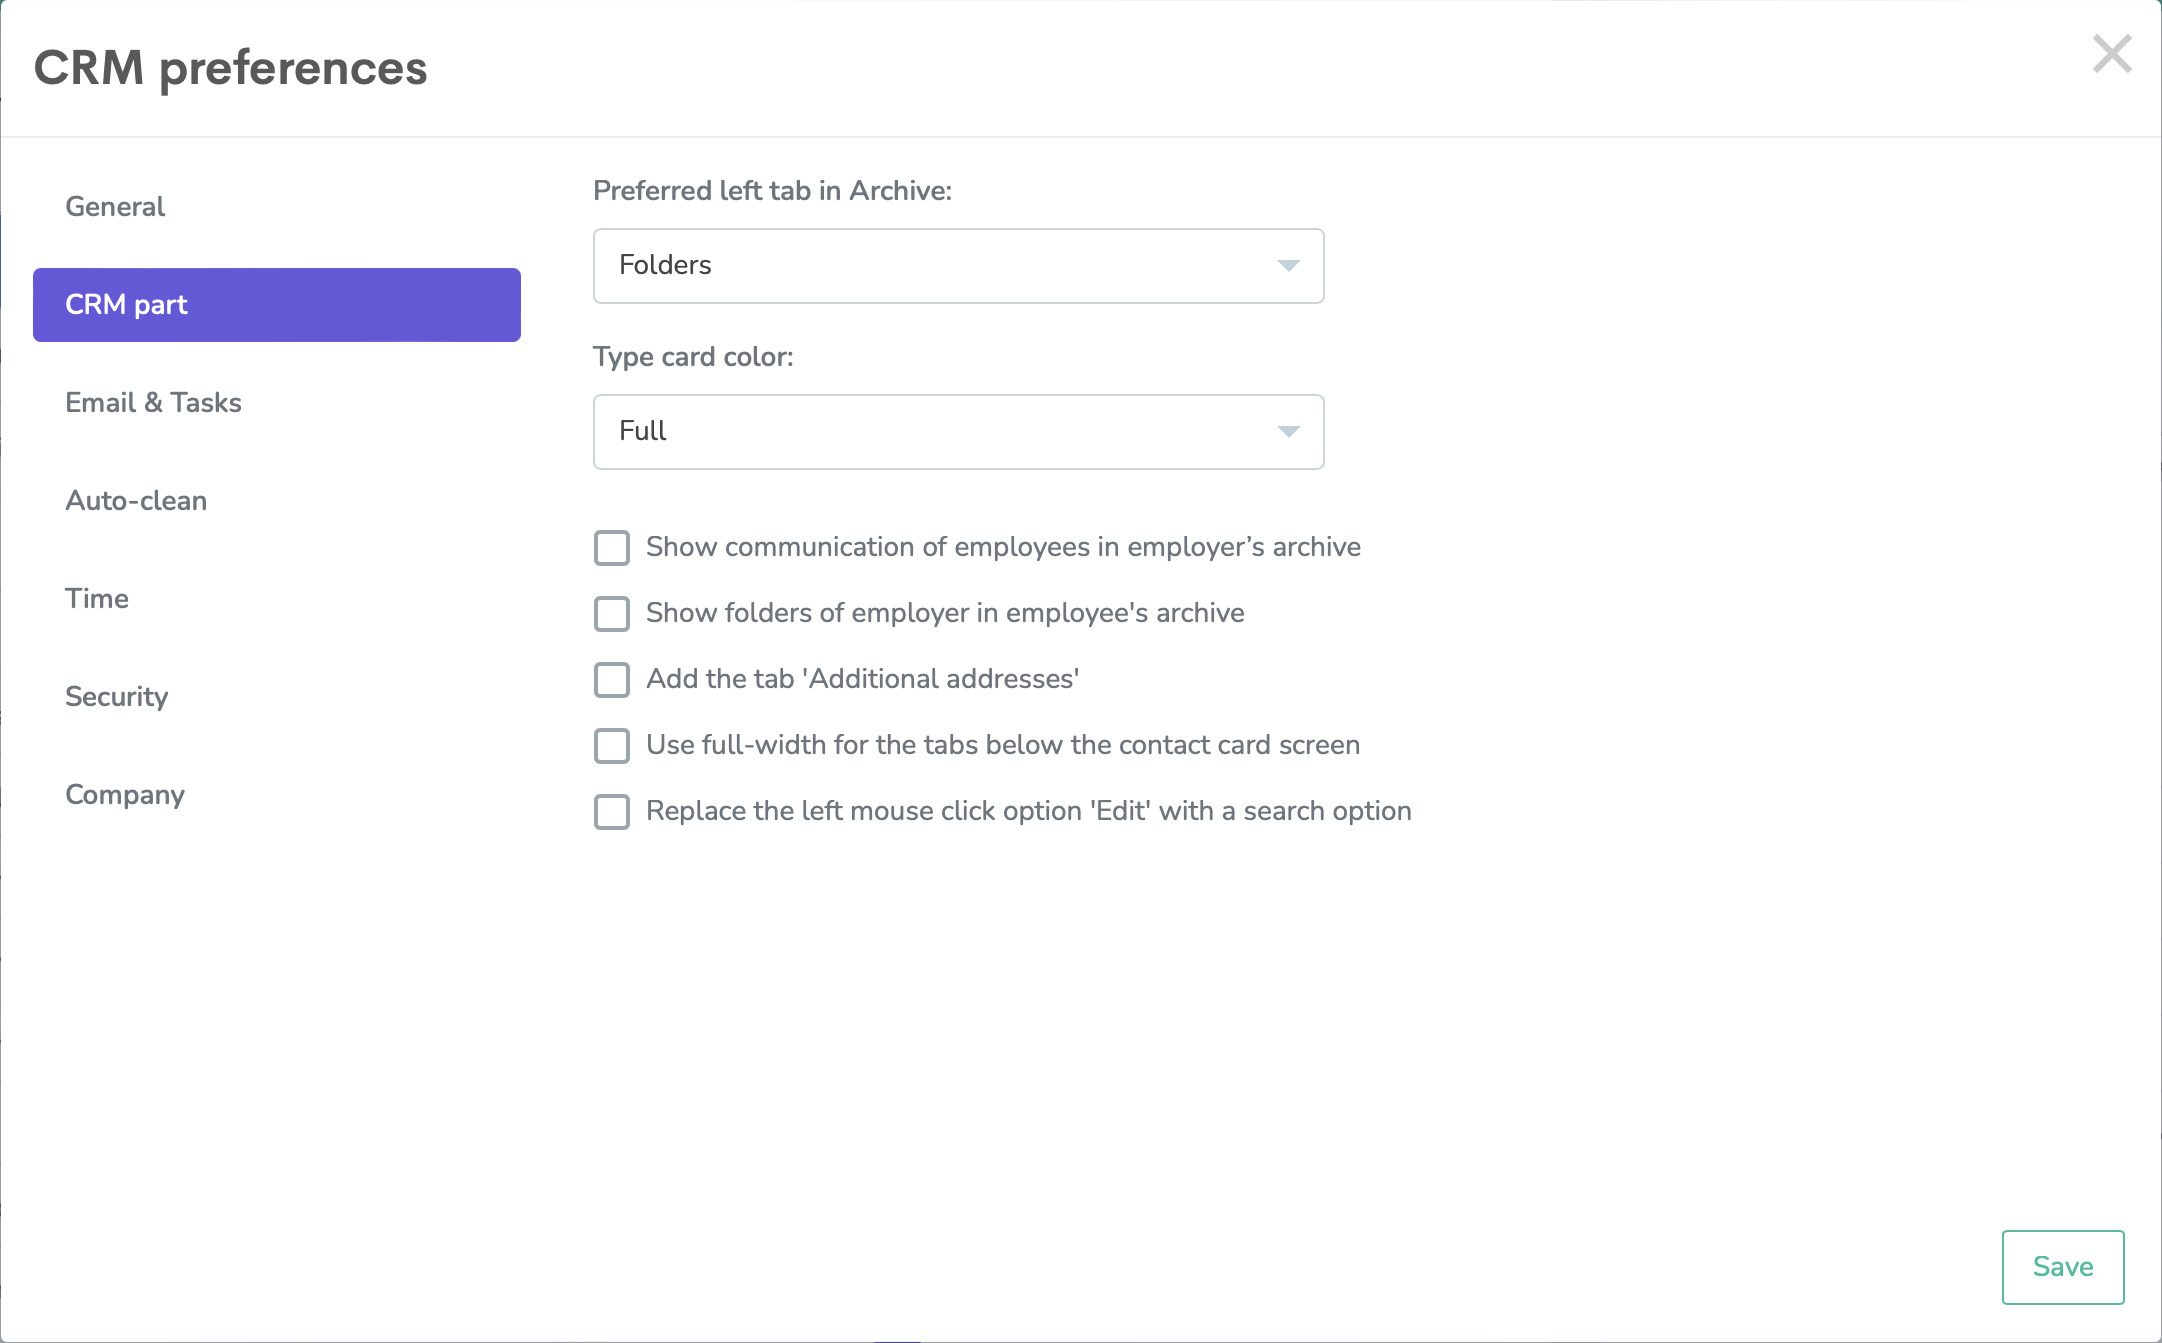
Default list bar in Archive
In a contact's archive, on the left side, there are two tabs; 'Communication' and 'Folders'. The drop-down option that is saved here as default defines the tab that is open once you navigate to a contact's archive.
Show communication of employees in the employer's archive.
In SpinOffice you can build a hierarchy level with one main contact card (=employer or company name) and employees below that. All will have their contact card with personal archives. When the setting 'Show communication of employees in employer's archive' is ticked, the archives of all employees are combined and chronologically shown in the archive of the main contact card (employer or company name).
Show folders of the employer in the employee's archive
It can be useful to show also the folders that belong to the main contact card of the company (mainly the employer card) when you are in the archive of any employee. How do you recognize the folders in an employee's archive? These folders have a blue folder icon instead of a yellow one.
Add the tab 'Additional addresses'
When you do have not enough space on the contact card for extra addresses, enable this option and an extra tab will be added on the right side of the contact card next to CONTACT DETAILS.
Use full-width for the tabs below the contact card screen
We advise you to activate this setting only when your company uses the additional Questionnaire module since this adds a tab below the contact card next to KEYWORD and it needs full screen at the bottom. Otherwise, there is no need to broaden the lower part.
Replace the left mouse click 'Edit' option with a search option
Tick this option when you want to have 'Edit' under the right click only, and a search box under the left click. The search box is a nice tool, it allows you to search for content in the field you selected. For example, if you click on the Company field, the search box appears and you can search on companies only.
This option is useful too when the left Contact list is hidden. The left Contact list can be hidden on request. Why would you hide the list? Well, experienced SpinOffice users do not use the left Contact list often for search, but prefer only to use a search field or search box on a field. And when the left Contact list is hidden there is more space on the right side of the contact card to show the Contact's dashboard.
16.3 Email & Tasks

Preferred view in Inbox
By default, the inbox shows the linked relationship instead of the actual sender. In this setting, this is 'Show linked contact'. This can be adjusted here to 'Show sender/email address'.
Keep the contact link on forwarding a message.
In a contact's archive, on the left side, there are two tabs; 'Communication' and 'Folders'. The drop-down option that is saved here as default defines the tab that is open once you navigate to a contact's archive.
Allow removal of attachments without deleting the message
Default, this option is ticked. When this option is disabled, none of the users can delete attachments without deleting the message itself. The general idea behind this is that an attachment always belongs to a mail message, so why should anyone be able to delete an attachment?
Deleting messages that include attachments is possible regardless of this setting. All deleted messages and attachments end up in the Trash folder of your inbox.
16.4 Auto-clean

Cleaning up your CRM database and keeping 'Garbage in, garbage out' away is essential! SpinOffice helps you by providing rules and parameters that you can set within the database as an administrator.
SpinOffice cleans up your trash.
Please specify the number of days that messages should stay available in your Trash folder in the inbox after you or one of your colleagues has deleted them in the inbox or a contact's archive.
SpinOffice cleans up your SPAM.
Please specify the number of days that messages should stay available in SPAM after you receive them. We connect through the IMAP protocol. This means that all emails that enter your SPAM folder in webmail will also end up in the SPAM folder in SpinOffice.
SpinOffice auto-deletes messages that you mark as finished and that are not linked to a contact or folder.
Please specify the number of days that messages should stay available after you finish them. These messages are not important to you, otherwise you would have linked them to a contact or folder before finishing them in your inbox.
SpinOffice will keep a backup of all your messages that are deleted, after deleting.
By default, we keep the data in the background for 30 days after the period that you have set as a parameter above. This period is used to restore incorrectly deleted files at the request of the customer. We give you the option to adjust the default 30-day period. After the number of days has passed, the data is automatically deleted from our backup server.
16.5 Time

When the Time registration module is activated, you can determine here what the default calculated time for an email should be, and whether this should apply to incoming and outgoing messages or a different amount of time. This time can be tracked on a task or file.
16.6 Security

SpinOffice CRM offers two-step verification (also known as two-factor authentication), an optional but highly recommended security feature. It is available in a Pro-account. Once it is enabled, SpinOffice requires a six-digit security code in addition to your password when you sign in to your account.
Read the FAQ article How to enable two-step verification for all technical information about this feature and its implementation.
16.7 Company

Save general information about your company here. All the fields can be used as merge fields in your email template. Here's the list of fields mentioned in this tab and next to that which merge fields in the — My list — dropdown in the email template builder is used for that field:
- Company name = «My Company Name»
- Street address «My street»
- City = «My city»
- Postal code «My Zipcode»
- IBAN number fields = «My Info2»
- BIC (SWIFT) = «My Info3»
- Bank city = «My Info4»
- COC number = = «My Info5»
- VAT number (EU) = «My Info6»
How to make your email template in the template builder? Read this FAQ.
Besides the general company information, you also have your details. Go to menu option Administration -> User settings -> User profile and fill in your personal information. This information is used for the email signature and for sending SMS text messages as well. Read more information about how to personalize your email template in this FAQ.
Was this article helpful?
That’s Great!
Thank you for your feedback
Sorry! We couldn't be helpful
Thank you for your feedback
Feedback sent
We appreciate your effort and will try to fix the article