Creating an appointment
- In the calendar, click New appointment, or double-click a day.
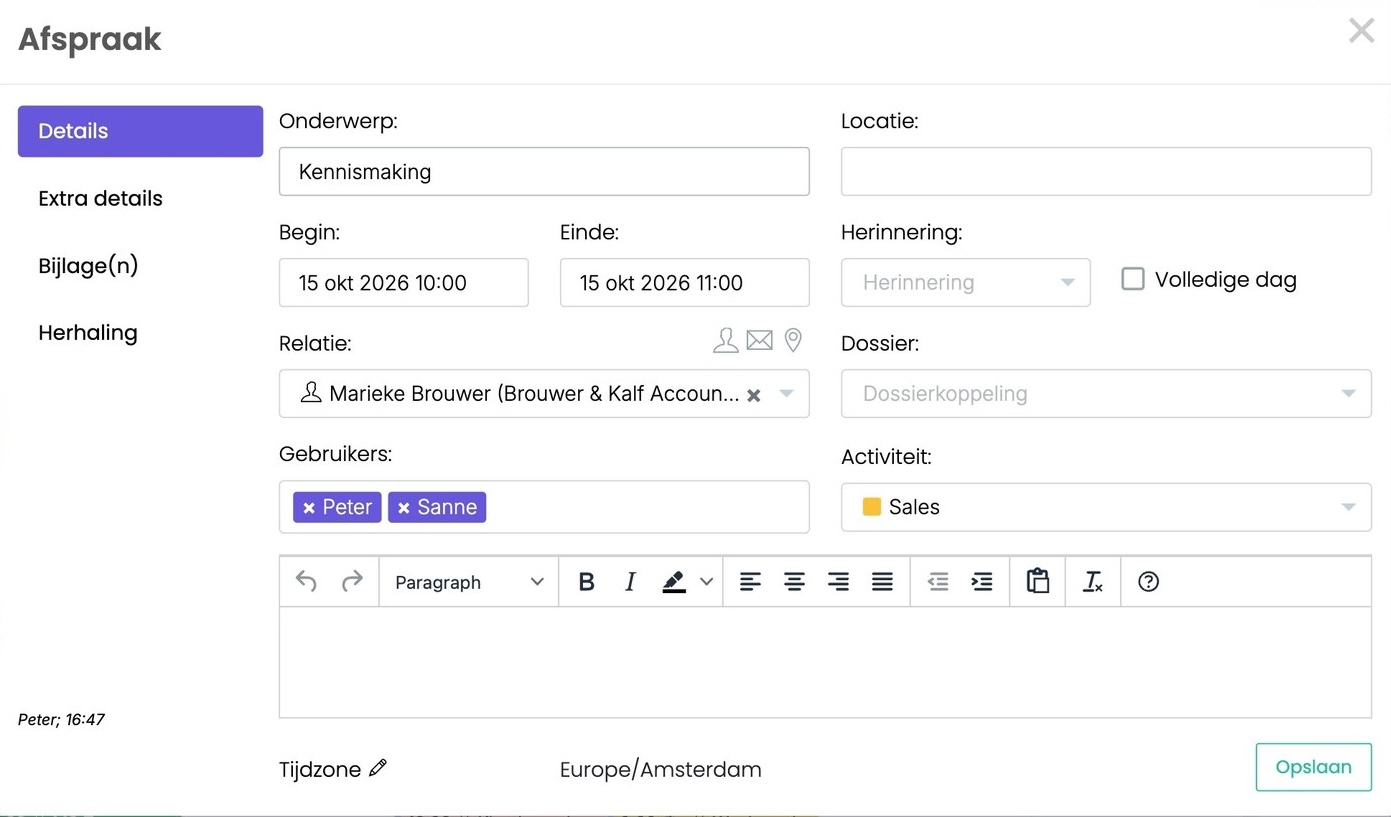
- Fill in the Subject, Starts and Ends, and the Location if needed. Does the appointment last all day? Tick All day.
- Under Contact, choose who the appointment is with. The appointment then appears in that contact's archive.
- Under Users, choose the colleagues who are coming along. The appointment then also appears in their calendar.
- Choose an Activity, for example Sales. It determines the color in the calendar.
- Click Save.
More options
- Reminder: choose when you get a notification. That notification comes from Outlook or your phone. Read more: Appointment reminders
- Folder: link the appointment to a folder.
- Note: type an agenda or preparation in the text box, for example.
- Extra details: the tab on the left for extra fields.
- Time zone: appointment in a different time zone? Click the pencil next to Time zone.
Next to Contact there are three icons: go to the contact, send an email, and use the address as the location.
Quick actions with right-click
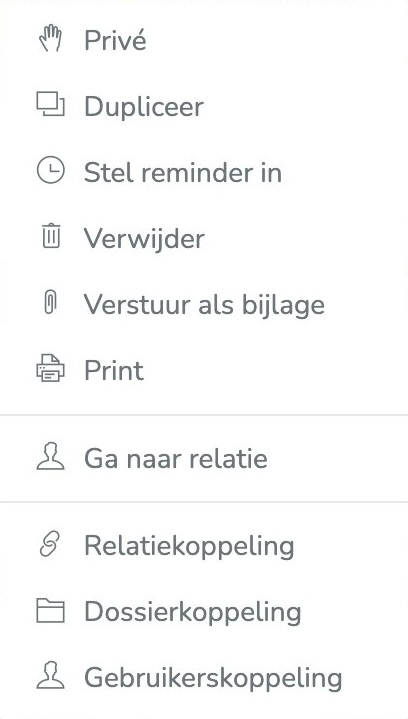
- Private: your colleagues only see that you're busy, not what the appointment is.
- Duplicate: make a copy, for example for a follow-up appointment.
- Add reminder: get reminded of the appointment.
- Send as attachment: email the appointment to the linked contacts, so they can add it to their own calendar.
- Go to contact card: open the contact card.
- Link to Contact, Link to Folder and Link to Colleague: link the appointment to an (extra) contact, folder or colleague.
- Delete and Print.
Adding attachments
Open the Attachment(s) tab on the left:
- From SpinOffice: choose the contact, and then a file from that contact's archive. Use Filter files and the file type to find it quickly.
- From your computer: drag a file into the box Drag files here to attach.
The files then appear under the attached files.
Recurring appointments
- Open the Repeat tab on the left and tick to repeat the appointment.
- Choose how often: daily, weekly, monthly or yearly.
- Choose the interval, for example every 2 weeks.
- Click Save.
You recognize a recurring appointment in the calendar by the icon with two arrows. If you change one appointment in a series, that appointment no longer belongs to the series.
Please note with Microsoft 365: a single change in a series is not yet synced correctly with Outlook. Does one appointment need to be different? Delete it from the series and create a separate appointment. Read more: Syncing your calendar with Microsoft 365
Was this article helpful?
That’s Great!
Thank you for your feedback
Sorry! We couldn't be helpful
Thank you for your feedback
Feedback sent
We appreciate your effort and will try to fix the article