With tags, you give contacts extra characteristics, for example a product they buy, an industry or 'Newsletter'. A contact can have as many tags as you like. They let you quickly find and filter a group of contacts, for example for a mass mailing.
Tag or contact type? A contact has only one contact type (such as Customer or Prospect), but can have many tags. Read more: Contact types
Prefer to watch? The video shows how it works (in Dutch).
Adding a tag to a contact
- Select the contact in the Contact List.
- In the contact widget, under Tags, click Add new tag.
- Type a new tag, or choose an existing tag from the list.
The tag is added to the contact straight away.
Want to tag many contacts at once? Filter them and use the bulk action to change tags. Read how: Bulk actions: editing many contacts at once
Searching and filtering by tag
- Via the search field: type # and the start of the tag, for example #news. You then choose the tag, or the tag with a status, such as Newsletter (Yes).
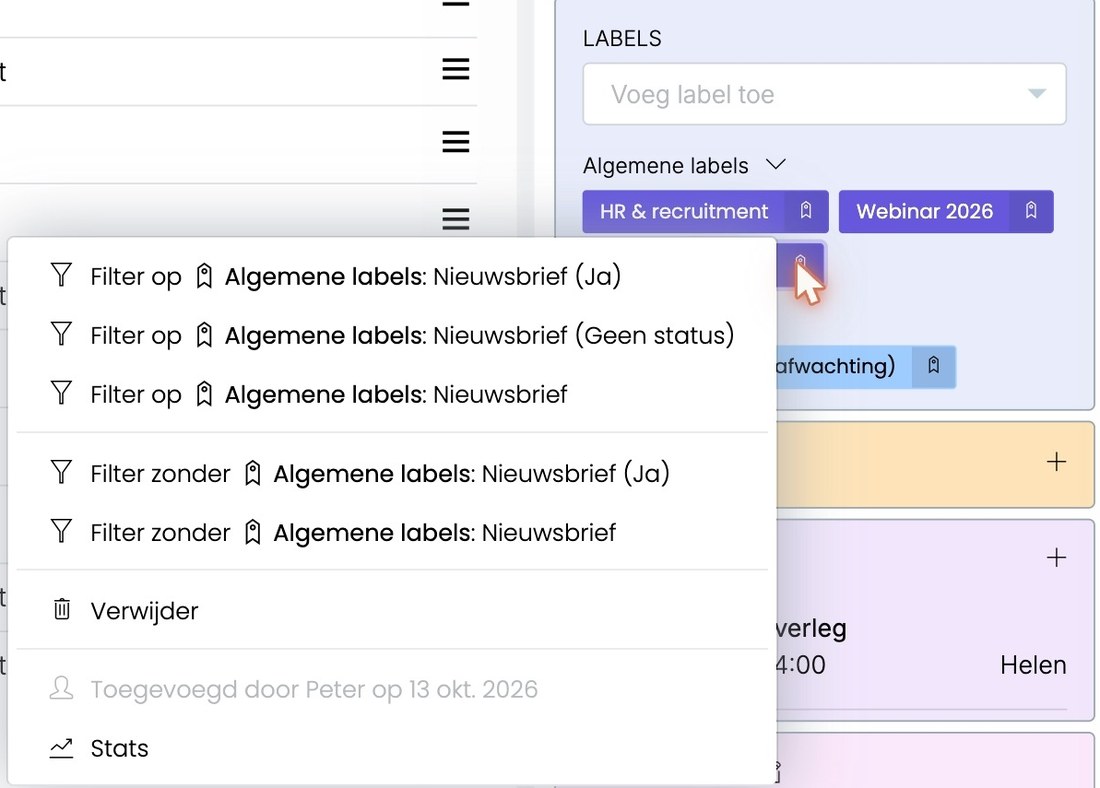
- From a contact: click the icon on the right of a tag. Choose Filter on selected field to see all contacts with this tag, or Filter excluding selected for all contacts that don't have it.
Managing tags
Everyone can add tags to contacts. Tags, tag groups and statuses are managed by an administrator. Go to ☰ > Administration > Tags. You see all tags per tag group, with the number of contacts that have each tag.
- Adding a tag: type the name and click +.
- Cleaning up: with Delete unused tags, you remove all tags that are no longer on any contact in one go.
- More options: click ☰ next to a tag for the tag status, info fields, moving it to another tag group, and deleting it. At the bottom you see who created the tag and when.
Tag groups
Tag groups keep a large number of tags organized, for example a group 'Events', 'Products' and 'Sales'. Each group has its own color. In the contact widget, tags are shown per group.
- At the top, under Tag group, choose the group you want to view.
- Use +, the pencil and the trash can next to the group to create, edit or delete a group.
A tag with statuses
Sometimes you want to record more with a tag than just 'yes or no'. For example for an event: who has been invited, who is coming and who isn't. Or for the newsletter: who said yes and who said no. For this, you give a tag statuses.
Setting up statuses
- Go to ☰ > Administration > Tags.
- Click ☰ next to the tag and choose the tag status.
- Type a status, for example 'Invite', and click +. Repeat this for each status, for example 'Attending' and 'Not attending'.
- Use the arrows to put the statuses in the right order.
- Click Save.
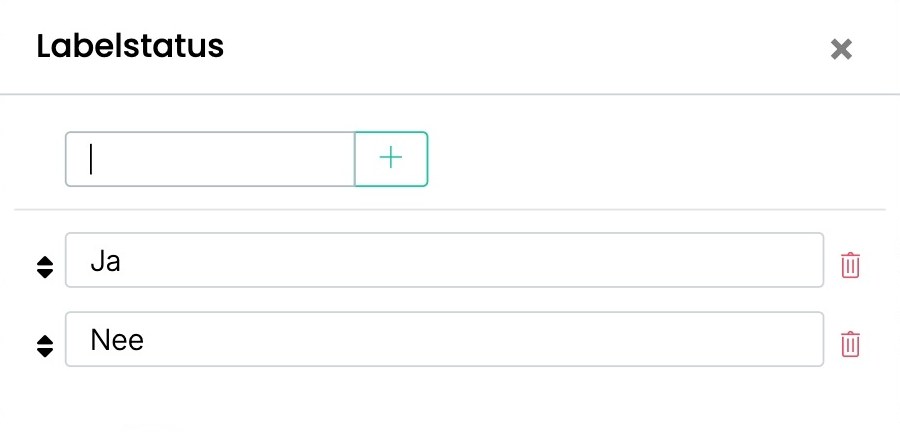
Tip: put a number in front of the statuses if they have an order, for example in a sales process: '1. First contact', '2. Demo scheduled', '3. Quote sent'.
Choosing a contact's status
- Select the contact in the Contact List.
- In the contact widget, click the tag.
- Choose the status, or none.
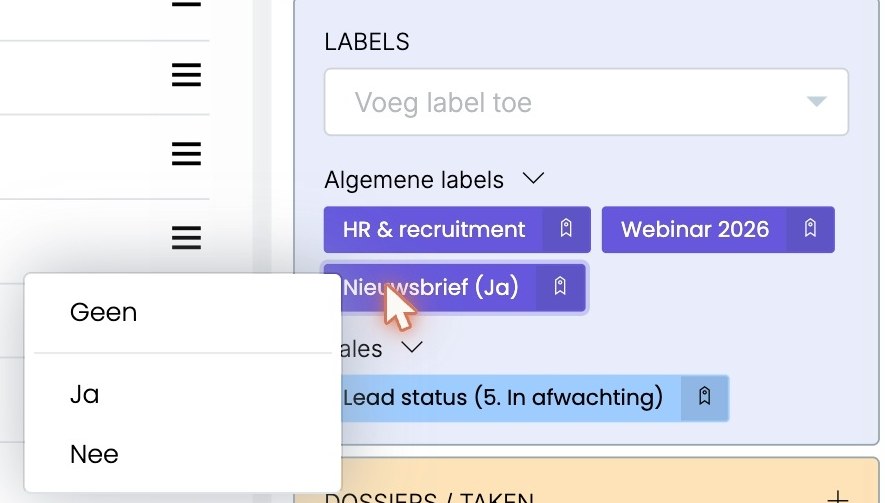
The status then appears in brackets after the tag, for example Newsletter (Yes). If a contact has tags with statuses, you see an eye icon at the top right of the Tags block. If such a tag doesn't have a status yet, you see two dots after the name.
Giving many contacts a status at once
Filter the contacts and use the bulk action to change tags. Choose the tag and the status, for example 'Summer drinks' with 'Invite'. All filtered contacts then get that status.
Filtering by status
Click the icon on the right of the tag. You can then choose to:
- filter on the tag with a status, for example all contacts with 'Summer drinks (Attending)';
- filter on the tag with no status: the contacts you haven't filled in yet;
- filter on the tag, regardless of status;
- filter excluding the tag or a status: all contacts that don't have it.
Statistics
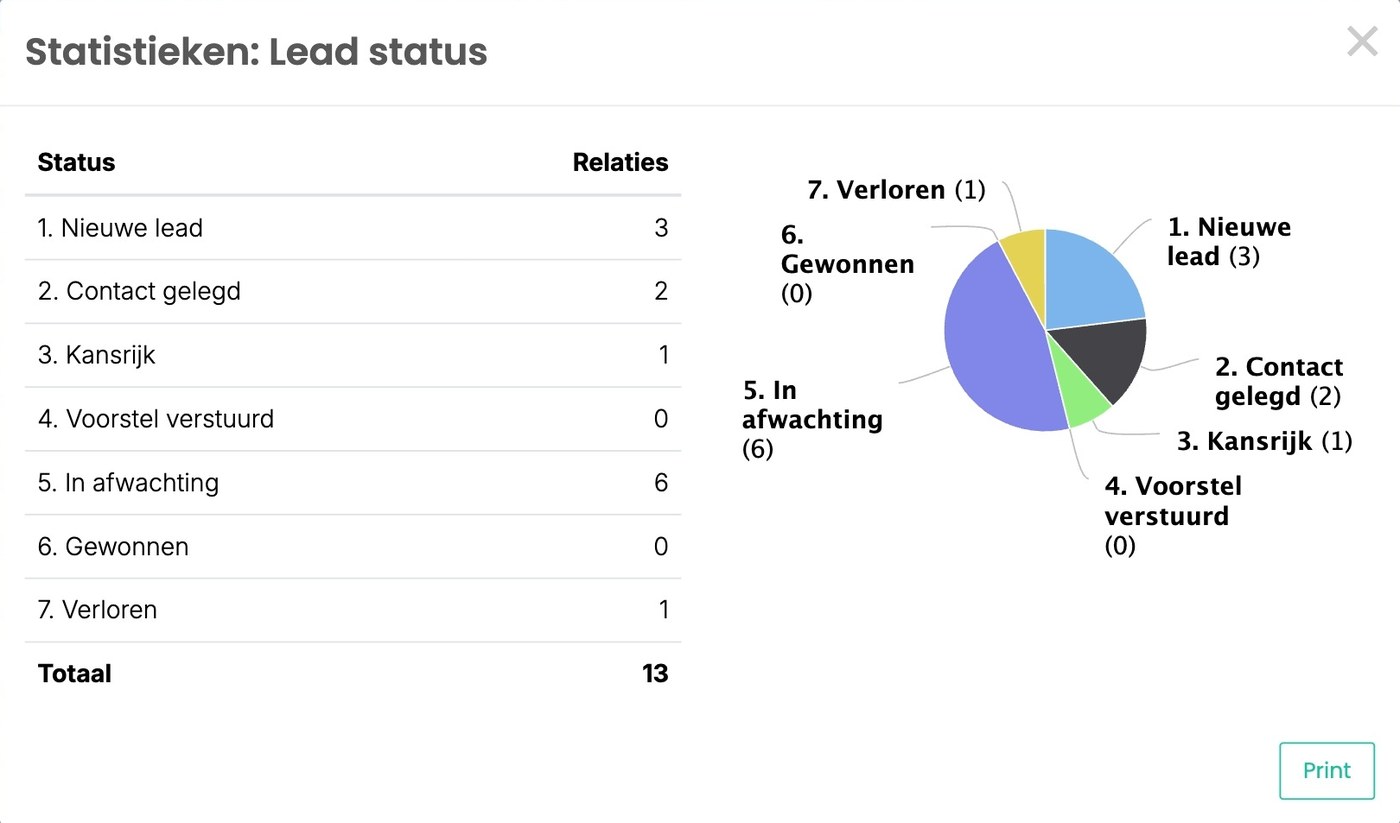
In the same menu, choose Stats. You then see how many contacts have each status, with a total and a chart. Handy for quickly seeing, for example, how many sign-ups you have for an event. Use Print to print the overview.
Deleting a tag
- From one contact: click the icon next to the tag and choose to delete it.
- From all contacts: delete the tag in ☰ > Administration > Tags. It then disappears from every contact.
Was this article helpful?
That’s Great!
Thank you for your feedback
Sorry! We couldn't be helpful
Thank you for your feedback
Feedback sent
We appreciate your effort and will try to fix the article