Set up the invoice module before you create your first invoice. You set how your PDF looks, which email your customer receives and which items you can invoice. You only do this once.
Opening the settings
- Click the $ icon in the left bar. In the desktop version, choose ☰ > Go to > Invoices overview.
- Click the gear icon in the narrow bar on the left.
- At the top right, choose the ledger, for example Sales. All settings on the page apply to that ledger.
Step 1: backgrounds and email
For each status (Proposal, Order, Invoice, Paid), you choose a background and an email template.
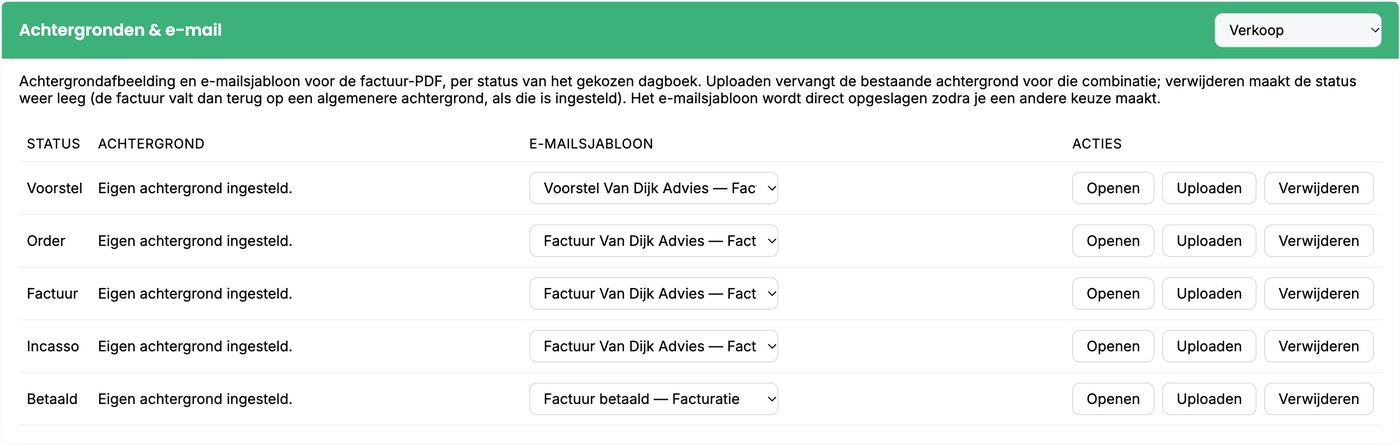
- Background: your letterhead, as a portrait A4 image (2480 × 3508 pixels, PNG or JPG). Click Upload. Want the same letterhead everywhere? Then upload the same file for each status.
- Email template: the template for the email you send the PDF with. Please note: your choice is saved immediately.
Tip: first create an email template for each status, for example 'Proposal' and 'Invoice'. Read how: Creating and editing email templates
Step 2: ledger details
Fill in your company details: address, phone, email, website, bank, IBAN, BIC and VAT number. Click Save.
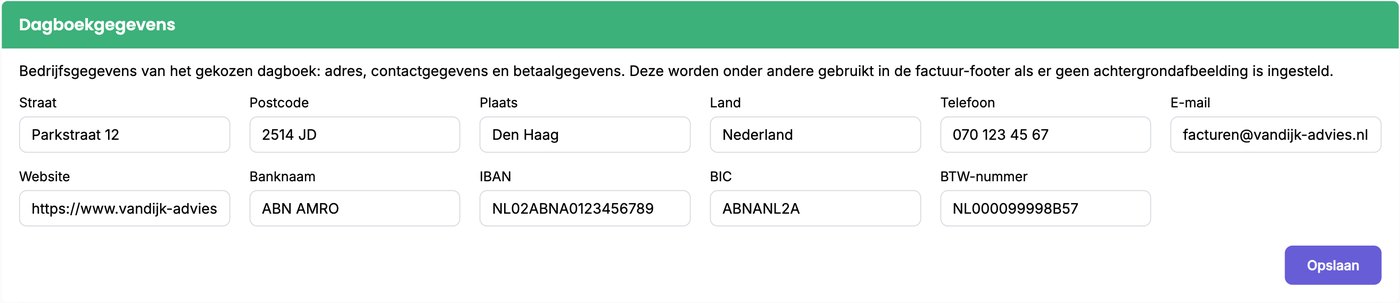
Haven't set a background? Then these details appear at the bottom of the PDF. If you do use a background, put them on your letterhead.
Step 3: PDF layout
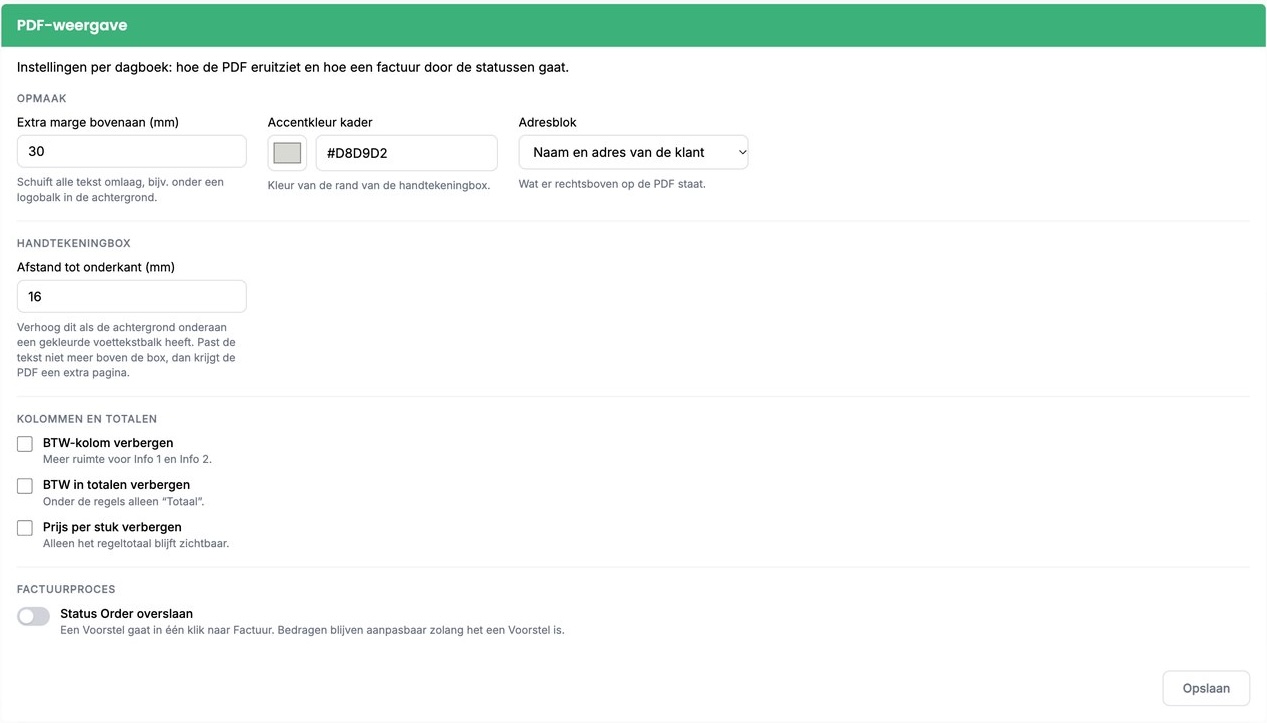
- Extra top margin: moves the text down, for example below the logo on your letterhead.
- Accent color of the frame: the color of the border of the signature box.
- Address block: what appears at the top right of the PDF, for example the customer's name and address.
- Distance to bottom: increase this if your letterhead has a colored bar at the bottom.
- Columns and totals: hide the VAT column, the VAT in the totals or the unit price.
- Skip Order status: a proposal then goes to invoice in one click.
Click Save. Adjust values in small steps and check the result with Open PDF on an invoice.
Step 4: items
Items are the products and services you invoice, with a fixed price, VAT and unit.
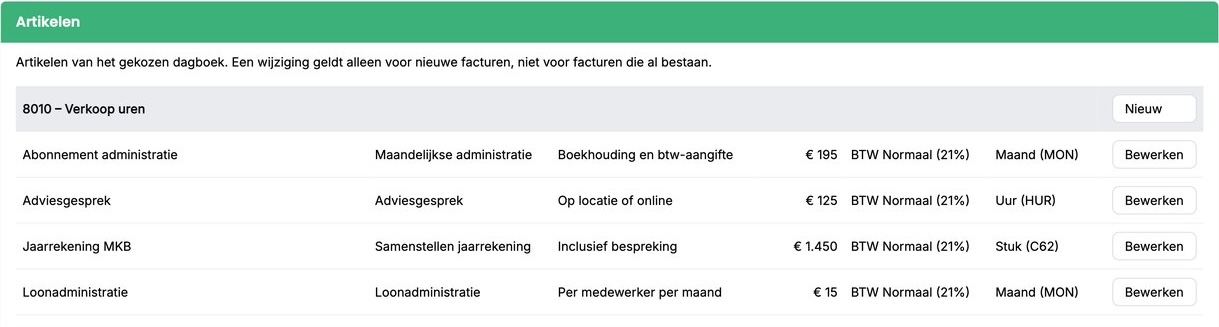
- Click New next to the general ledger account, for example 8010 – Sales hours.
- Enter the description, optionally Info 1 and Info 2, the price, the VAT code and the unit.
- Click Save.
Use Edit to change an item. This only applies to new invoices. You can't delete items, so choose the description carefully.
Good to know
- You manage ledgers and VAT codes in the desktop version via ☰ > Administration > Invoice.
- Done? Create your first invoice. Read how: Creating an invoice
Was this article helpful?
That’s Great!
Thank you for your feedback
Sorry! We couldn't be helpful
Thank you for your feedback
Feedback sent
We appreciate your effort and will try to fix the article